I wonder if someday, maybe when I climb both Mount Fuji and Yellow Mountain in the same week, I will understand how Canon names their SLR bodies.
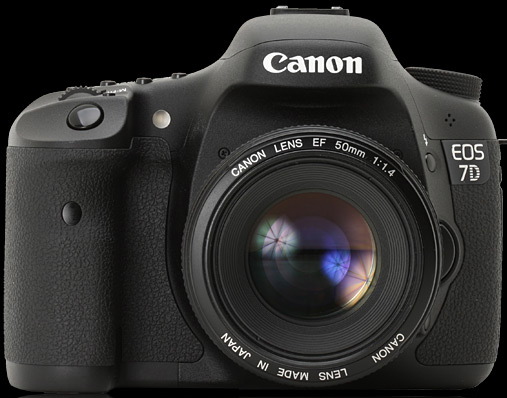
Today Canon announced the EOS 7D. The name makes it sound like the 5D, but it is decidedly unlike it. It is vastly superior in every way, except in pixel count, and by a very significant difference in sensor size. The 7D is an APS-C body, with a crop factor of 1.6.
The main reason you’re reading about the 7D here is that it records HD video. Canon has done with the 7D what they either could not or would not do with the 5D Mark II: they have included a plethora of useful frame rates (revised, see update below).
- At 1920x1080: 23.976, 24, 29.97, 30
- At 1280x720: 50 and 59.94 (often called 60p)
Check, check, and check. That’s pretty much awesome. I mean, we can dream of 50 and 60 fps at 1080p, but in all fairness those frame rates are usually only found at 720p even on very high-end HD cameras.
Combining that with the same manual control that came at long last to the 5D Mark II, and you have a camera that addresses some of the biggest shortcomings of DSLR cinematography.
Some, but not all. Does the 7D skip lines to create its HD images? Seems so. Is the compression still aggressive and unfriendly to post? Probably. Rolling shutter Jell-O? Likely. And there’s still no video-friendly autofocus such as we find in the Panasonic GH1.
(I know that we classy filmmaking pros are supposed to hate on autofocus, but as I wrote in the DV Rebel’s Guide, the truth is that, for the crew-of-few, it’s a nice option to have. Especially when it’s smart enough to track faces, even specific faces. Focus pulling is hard. Focus pulling while operating a clumsy camera with no focus aides of any kind and a VistaVision-sized chip has had me secretly longing for video autofocus on my 5D Mark II. Focus pulling while swinging your SLR around on a Steadicam Merlin is actually impossible. So please forgive my pining for fingertip on-off smart-as-heck autofocus on my big-chip digital cinema camera.)
What’s missing from the 7D?
- Autofocus (see above).
- Focus-assist while recording, in the form of an edge-detection display overlay.
- Gentle compression (although it seems the 7D’s video bitrate might be a little higher than the 5D’s).
- Funky frame rates. Even Jackie Chan shoots his fight scenes at 22 fps. After a big lunch, he might call for 21 or even 20fps.
- Decoupling shooting frame rate from playback. I’ll probably shoot a ton of stuff at 60p for slow-mo, adding more fun to the workflow puzzle posed by these cameras that crash the video party without a SMPTE invite.
- Video ergonomics. The 7D lacks a flip-out LCD. They call it that because if the 7D had included one, I would have seriously flipped out. I’d like to lose the double chin.
- Quality. The 7D still skips lines to make its HD images, resulting in aliasing and color artifacts. And it still has rolling shutter issues.
- Recordable HD HDMI output.
- Full-frame.
Yeah, let’s talk about that last one. Yesterday, when the 7D’s specs were “translated” from Chinese into English by some sort of cruel, sadistic computer, many people, presumably 5D fans, called its APS-C sensor a “deal breaker.”
The 5D Mark II is the camera I want for shooting stills. How luxurious that it also shoots video, albeit with many limitations. I very publicly hoped Canon would shore up those shortcomings, and they did, some. It did occur to me though, when the Canon/Nikon DSLR arms race grew to encompass video, that my ideal stills rig may not always happen to be my perfect motion rig.
Ever since I treated myself to the original 5D, I’ve been hooked on full-frame. Or should I say re-hooked, as it was the 5D that made digital photography once again as rewarding as it had been with my 35mm Nikormat. I have no interest in a crop-sensor DSLR for shooting stills. But is APS-C an acceptable sensor-size for filmmaking? Ask any RED One owner. Or for that matter, any 35mm motion picture camera owner. APS-C is quite similar to the Super-35 imager size regarded as a holy grail in digital cinema.
APS-C is a perfectly awesome sensor size for filmmaking. The proof is… movies.
But it’s not that simple.
RED, Panavison, Arri, and others have optimized their cinema prime lens offerings for that Super 35 size. Canon’s range of big, expensive primes make sense on their big, expensive, full-frame cameras. Canon’s 24, 35, 50 primes become 38, 56, and 80 equivalencies, respectively. There’s a pricey 14mm that becomes a 22, but nothing between that and the 24(38)mm. To achieve a nice range of focal lengths for 7D filmmaking, you’ll have to use zooms. Since you have to work harder to achieve shallow depth of field, you’ll need expensive, fast-and-wide zooms. The optional kit lens will kill your DOF fetish faster than a $3500 1/4” JVC GY-HM100U. The 16–35mm f/2.8L will be a popular lens for filmmakers—it is to the 7D (roughly) what the beloved 24–70mm f/2.8L is to the 5D.
UPDATE: Several commenters have pointed out that the less-expensive, longer-ranged EF-S 17–55mm f/2.8 IS (27–88mm equivalent) might be an even better choice if you don’t care about compatability with a full-frame body. The 17–55 seems like a terrific lens, but I will stick to lenses that I can use for both video on the 7D and stills on my 5D Mark II.
The twice-as-vast area of the 5D Mark II’s sensor means more flexibility with more lenses, and more control over DOF. Yes, this includes the option to push it to a fetishistic extreme, but also the ability to achieve cinematic DOF with the slower stop of an affordable, flexible zoom lens. So Canon, if complaints about the 7D’s sensor size get annoying, you have no one to blame but yourself. It was you who hooked us on the glorious excess of affordable digital VistaVision filmmaking.
So now there’s a camera that, technically speaking, does everything better than my 5D Mark II. Better autofocus, more stills-per-second, better weather sealing, and better flash control.
But I don’t care. For stills, I’ll stick to my 5D Mark II. Eight-perf VistaVision, what stills folk think of as “full frame,” is the right sensor size for my kind of photography.
But APS-C, roughly the same as four-perf 35mm and what cinema folk consider full-frame, has been well-established as a wonderful size for filmmaking.
So you got me Canon. I’ll probably buy a 7D, and use it for nothing but video. I may have to switch up my lens shopping list, bumping up the 16–35 ahead of the 70–200. At least I can buy lenses that I can use with both my stills rig and my interchangeable lens, variable-frame-rate, Super 35(ish) sensor HD video camera.
That costs $1700.
And that’s the punch line: An interchangeable lens, variable-frame-rate, Super 35(ish) sensor HD video camera for $1700.
Canon, you’re gonna sell a bazillion of these. And you deserve to.
It’s tempting to project right past the 7D and imagine that maybe the rumored successor to the 1Ds line will capture all the new stills improvements of the 7D and combine them with a full-frame sensor. For a mere several thousand dollars you could have it all. Maybe. At some indeterminate time in the future.
Screw that. The 7D costs as much as a nice lens and it’s real.
If you can get your hands on one.
Do I still love my 5D Mark II? Absolutely.
Do I wish Canon would sprinkle it with magic 24p dust? Of course.
Is the 7D the perfect DV Rebel Camera? No. I still recommend a good, solid HD camcorder for filmmaking that doesn’t require fetishistic shallow depth of field. Which, FYI, is almost all filmmaking.
Has DSLR cinematography arrived?
Yes.
As of today (and barring any unforeseen surprises), the answer is yes.
Pre-order your 7D from Amazon now.
I sure did.
Update
on 2009-09-01 19:16 by Stu
Chuck Westfall clarified the 7D’s frame rate options on the CML today:
The accurate video frame rates for the EOS 7D are stated correctly in the Canon USA press release: The 30p setting is actually 29.97 fps; 24p setting is actually 23.976 fps; and 25p setting is 25.00 fps. In the 720p and SD video modes, the accurate frame rates are as follows: The 50p setting is 50.00 fps and the 60p setting is 59.94 fps.
He’s right, the press release reads like this:
The EOS 7D Digital SLR camera will record Full HD at 1920 x 1080 pixels in selectable frame rates of 24p (23.976), 25p, or 30p (29.97); 720p HD recording at 50p or 60p (59.94) and SD video at frame rates of 50p or 60p (59.94).
I’ve revised my frame rate list above to match.


